Building Access

450 S. 22nd St Heath, OH 43055

Access

There are three types of access into the building.

  1. Cards
  2. Code
  3. Remote
    User Credentials (CARDS)
  • Cards are used to access the building by swiping the card on a reader at an access point.
  • The Card unlocks the door and Disarms the alarms if the building is armed.
  • Depending on the setup, sometimes a User Code is required in addition to the card to disarm the system after the card has been used to unlock the door.
  • The Access cards consist of an Internal ID number and an External Reference number which are used to identify and assign the Card to a user.
  • The internal number is not visible and can only be accessed with admin rights and by swiping the card from any Access Point.
    User Codes (DISARM CODES)
  • Codes are 4-digit numbers used to access the App, Website Dashboard as well as disarm the system upon entry.
    Remote Access (App)
  • Users with app access can unlock entry doors from within the app. This allows them to let someone in while not having to be phisically present at the building.

Cards

    Adding a New Card to the system

    1. Take the new card to the nearest Access Point and swipe it on the Card Reader
    2. This logs the internal ID into the History Dashboard
    3. Log into the Dashboard and Select “View All” in the History Section of the dashboard.
    4. There should be an entry  with a message stating Access Denied and referencing a ID Number. This is the Internal ID number of the card.

    Assign New Cards to Users
    1. Click on the “Add Card Button” to Create a new user with the Card.

    2. The Internal ID is Pre Filled with the ID number of the Card you Swiped at the reader.
    3. Fill out the Rest of the New User Form and click save

    Existing User Card (Replacement)

    1. If replacing an existing Users Card just Copy the Internal ID number and Paste into their Profile

Codes

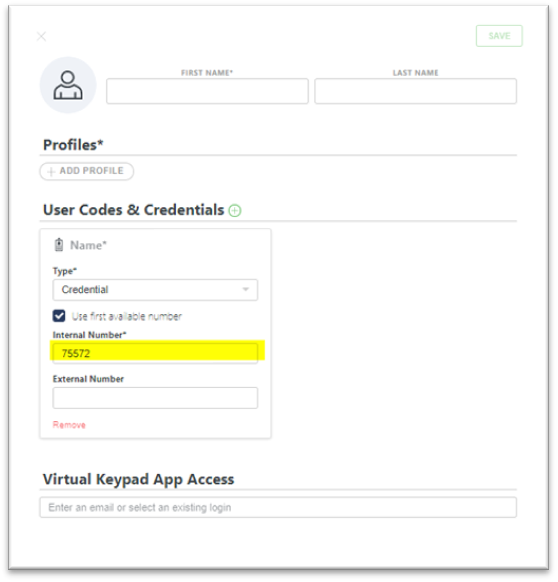
Codes can be created for New users as well as Existing Users following the same steps below

    Create New Code

    1. From the New User/Edit User screen, Click on the "+" button next to "User Codes & Credentials"
    2. Select "Code" from the "Type" Dropdown Selection
    3. Enter a "4 Digit Code" and click save
    4. Codes need to be Unique so if that code endered is already used you will see an error message and will be asked to enter a diferent code.

Remote Access (APP)

    Heading

    1. text
    2. text
    3. text
    4. text

Users

    Add a New User
    1. From the dashboard, select “Users” from the left side menu
    2. Click the “USERS +”Button
    3. Fill in the First and Last name of the person the card is for.
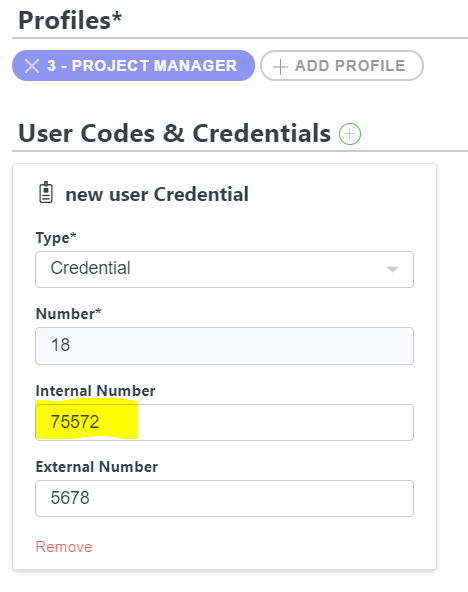
    4. Select a Profile to assign to the User. 

    5. NOTE! Do Not Asign "All Access" Profiles to Users
    6. The Profile includes a Schedule for access

      Profile Days Begin End Areas
      Sr. Manager All 12 AM 12 AM Front, Rear, Warehouse
      Project Manager All 12 AM 12 AM Front, Rear
      Hourly Weekdays 6 AM  7 PM Front, Rear
      Special Visitor Weekdays 6 AM 9 PM Fronr, Rear

Setting up Admin Access

Only App users can access the dashboard and control the system

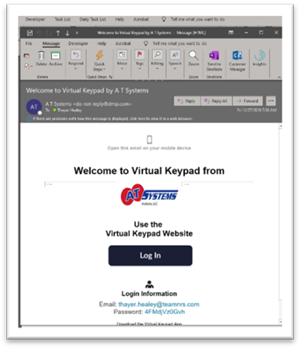
  1. You will receive an email from AT Systems with a login and Temporary password.

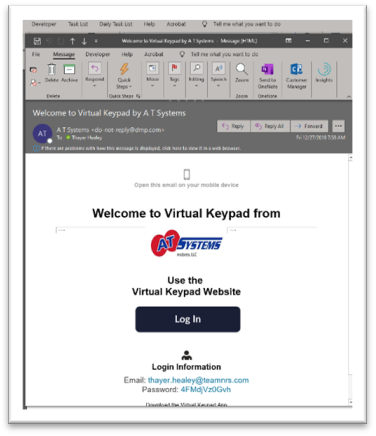
  2. Select the “Use the Virtual Keypad Website” button to open the website

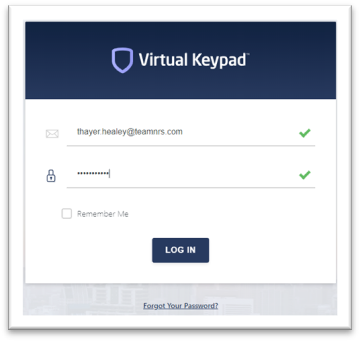
  3. Login in with the credentials provided in the email: Enter your user code

Change Your Password
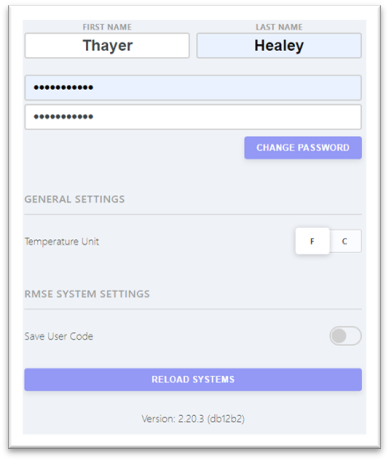
  1. Select Setting from the Profile Dropdown at the top right side of the dashboard

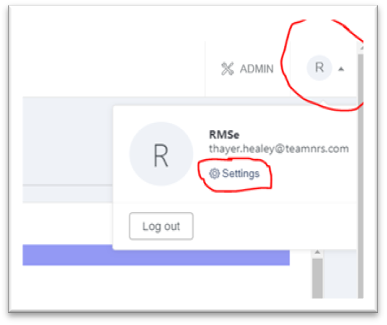
  2. Enter a new password and click on the “Change Password” Button

  3. Logout then log back in with your new password to save to the browser.

Adding a New App User
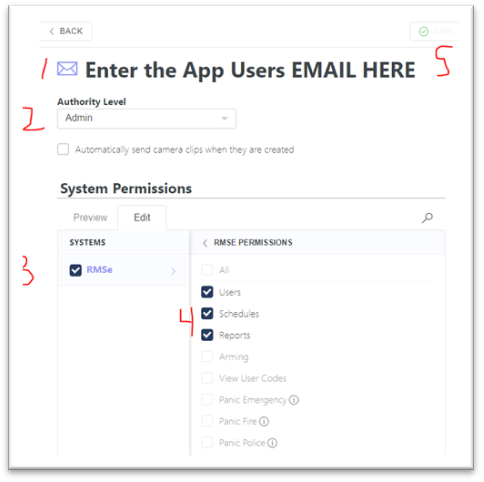
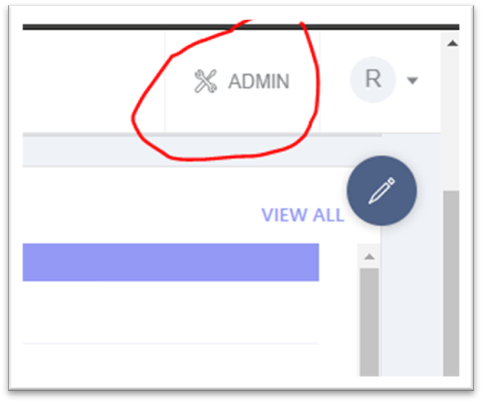
  1. Click on the admin button at the top right side of the dashboard.

  2. Select APP USERS from the left side Menu

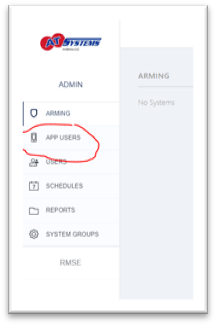
  3. Click on the “APP USERS + “ button to add a user

  4. Enter the users email address. (this is where the system sends the welcome email with credentials).

    1. Set the authority level to Admin
    2. Select “Edit” under “System Permissions
    3. Select “RMSe”
    4. Select “Users, Schedules and Reports” options
    5. Select “Save” button at the top right

  5. The User will receive an email from AT Systems with their credential